

WELCOME
to the PlanetCare community of Ocean Heroes!
Your Planetcare microfiber filter is easy to install. Simply download the manual with all the necessary steps to get your filter up and running in no more than 10 minutes!
No professional help or extra tools required.
HOW TO INSTALL THE FILTER?
HOW TO CHANGE THE CARTRIDGE?
DETAILED INSTALLATION
STEP 1
Attach the filter holder to your washing machine
PlanetCare 2.0 can be fitted on your washing machine or any other vertical surface near by, as long as it ensures stability and easy access.To attach the filter holder, use the double-sided tape on the filter holder. Do not worry, it is strong enough to hold it in place firmly. You can also attach the holder with two screws (not included).
HOW TO ATTACH THE HOLDER
- Select a section of the washing machine (or other surface) that is as even as possible.
- Thoroughly clean the surface where you’ll attach the holder (this is best done with 70% alcohol).
- Be careful not to touch the sticky tape after you’ve removed the protection layer.
- Attach the holder to the cleaned surface & press firmly for 5 seconds.


STEP 2
Attach the holder on your filter
You will need to attach the holder on your PlanetCare 2.0 microfiber filter. The holder does not come pre-installed, because you can install it on either side of your washing machine.
WHERE IS THE HOLDER?
You will find the filter holder attached to the wall holder

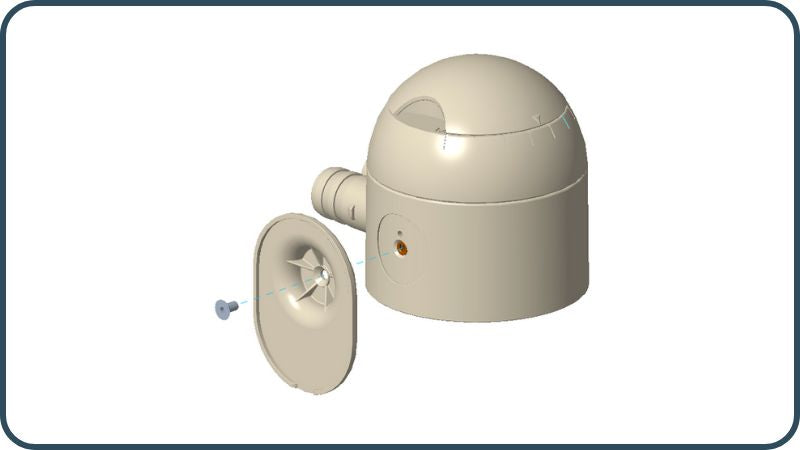
LEFT SIDE PLACEMENT
The holder must be fitted on the right side (hose attachments are in the back). Use the supplied screw.
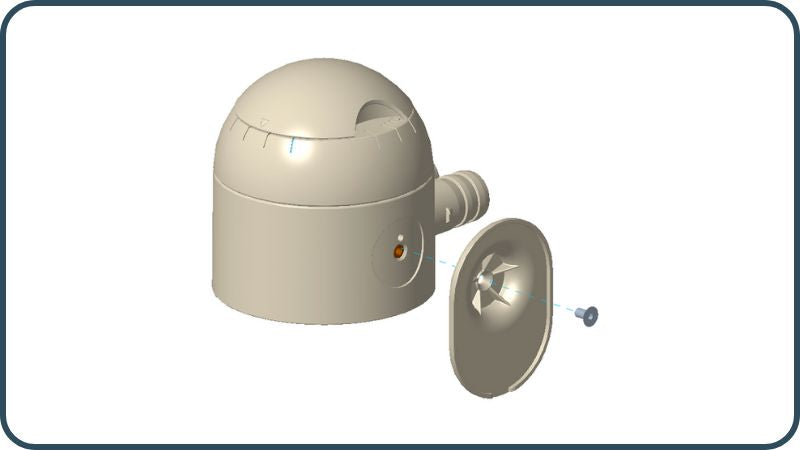
RIGHT SIDE PLACEMENT
The holder must be fitted on the left side (hose attachments are in the back). Use the supplied screw.
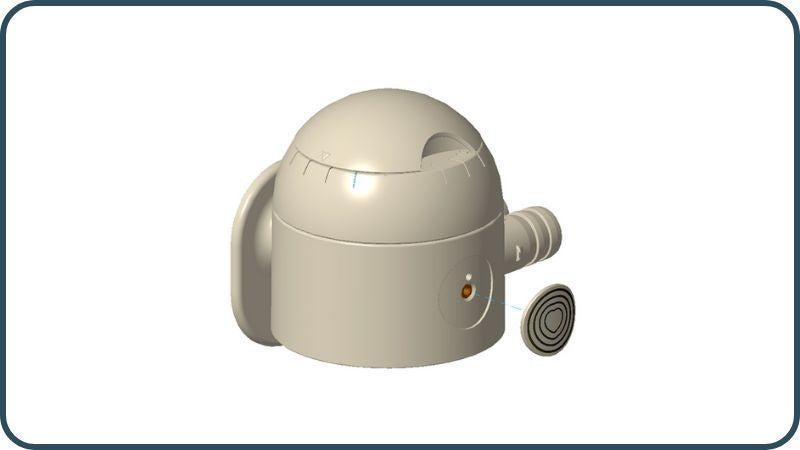
LOGO PLACEMENT
Attach the logo on the opposite side.

STEP 3
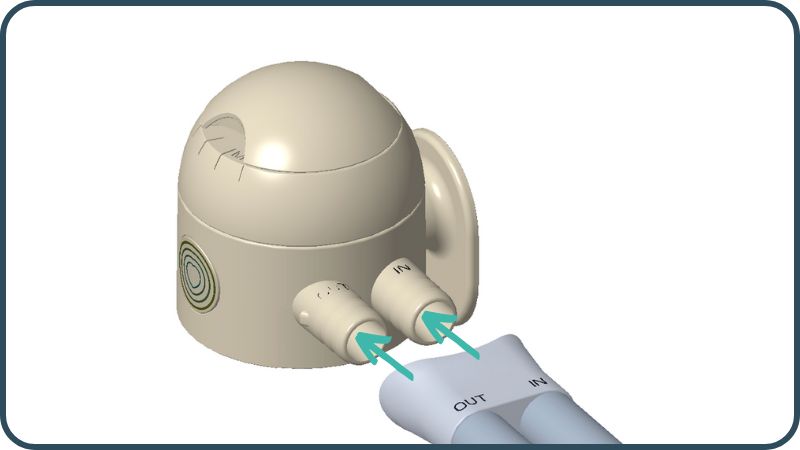
Connect the hoses
PlanetCare 2.0 comes equipped with two hoses that are joined together for easier installation.
Water from the washing machine into the filter comes from the hose marked with “IN”, while water from the filter and into the drain is marked with “OUT”.
Before using the filter, make sure that you connected the hoses securely.
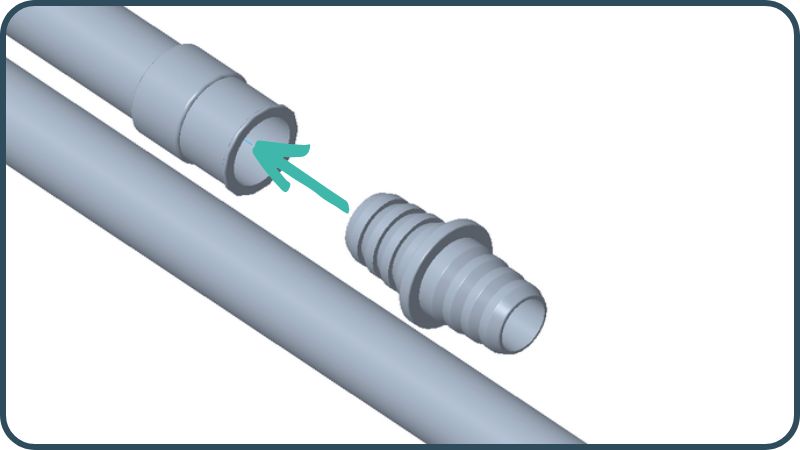
CONNECT TO THE FILTER
Make sure that you correctly attach the hose to the filter - watch for “IN” and “OUT” marks on the connectors and hoses.
CONNECT TO THE WASHING MACHINE AND DRAIN
Attach the hose connector to the end of the “IN” hose (the shorter one) and connect it to the drain hose from your washing machine. Connect the end of the “OUT” hose to the drain.
STEP 4
Attach the filter cartridge
PlanetCare 2.0 filter cartridges are attached to the filter housingwith a bayonet attachment that securely holds them in place.
Before using the filter, make sure that the cartridge is attached securely.
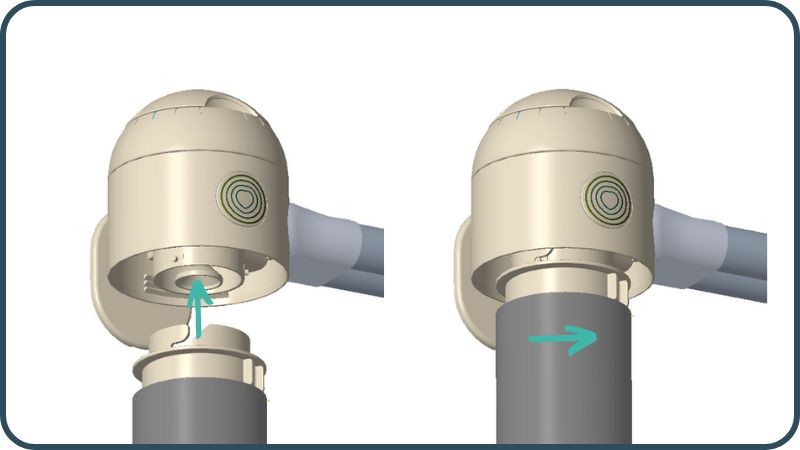
CONNECT THE CARTRIDGE TO THE FILTER HOUSING
Affix the cartridge to the top of the housing and twist it to the right until you feel a slight click. That is the indicator that the cartridge is securely attached.
STEP 5
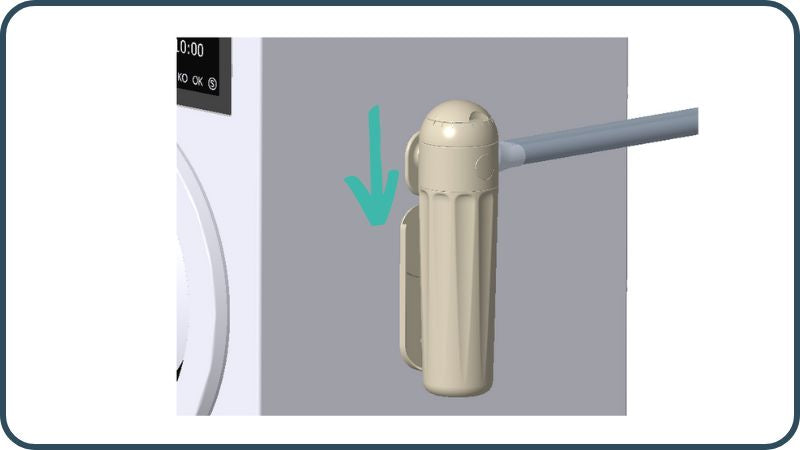
Attach filter to the holder
Slide the filter onto the filter holder securely. Your PlanetCare 2.0 microfiber filter is now correctly installed and ready to use
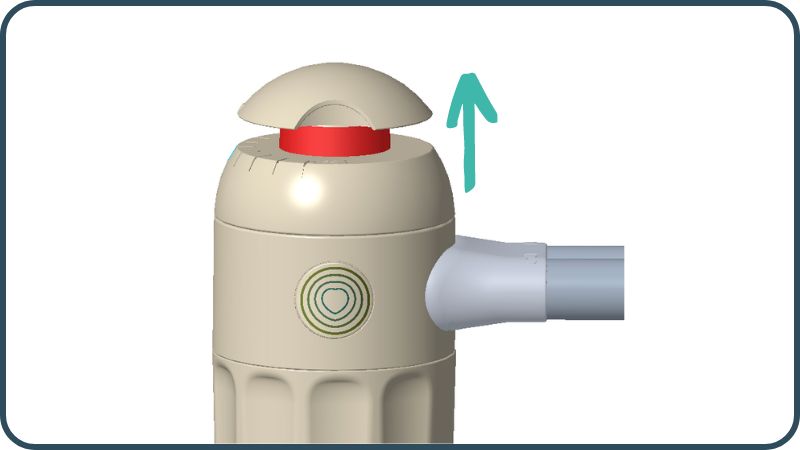
BYPASS AND CARTRIDGE REPLACEMENT INDICATOR
This filter is equipped with an automatic bypass that activates when the cartridge reaches full capacity. When the handle is in raised position, it serves as a visual indicator that it is time to replace the cartridge.The bypass can also be triggered manually when washing clothes made from natural materials.
PERFORMANCE ADJUSTMENT
In some cases your washing machine might indicate an error while pumping water out of the machine and your clothes might not be drained properly. That is an indication that the automatic bypass has not been triggered when the cartridge was full. On the other hand, sometimes it might happen that the automatic bypass is triggered too soon, before the cartridge is truly filled. Do not worry, it’s all a matter of a small adjustment.
SETTING RING
PlanetCare 2.0 has a setting ring that adjusts the sensitivity of the automatic bypass. The ring is factory set to the middle (neutral) position.

FACTORY SETTING IS TOO WEAK
If the bypass indicator turns on before your cartridge is fully used, the factory setting is too weak. This results in your cartridge enduring fewer washes than it's capable of.
HOW TO FIX IT?
Turn the adjustment wheel one line towards the MAX indicator (to the left). Repeat this until you see an increase in filter cartridge durability. If your machine begins to have difficulty in pumping water (error message on washing machine), turn the wheel back one line towards the MIN indicator.

FACTORY SETTING IS TOO STRONG
If the bypass indicator doesn't activate automatically after the cartridge is full, the factory setting is too strong. This may lead to wet clothes or difficulty in pumping water (error message on washing machine).
HOW TO FIX IT?
Turn the adjustment wheel one line towards the MIN indicator (to the right), and repeat until the bypass starts activating automatically for smooth operation (properly drained clothes and no error messages on the washing machine).

And how to replace the cartridge?
Step 6
Unscrew the cup and remove
the dirty cartridge. Let it drain and dry for return and reuse.
Now take a new cartridge and
attach it into the housing top. Attach and tighten the cup and your filter is ready to use again.
Step 7
When you’ve installed the
last clean cartridge, pack all your dirty cartridges in a box and return them to PlanetCare for recycling.
Shipping is on us!
YOUR PLANETCARE 2.0 FILTER IS READY. HAPPY FILTERING!
Thank you for caring!
If you have any questions or feedback please contact us at support@planetcare.org.